Fieldcraft · Practical UK birdwatching
How to scan the sea for birds
Divide the sea into manageable bands and scan each in the same order. Start with common shapes close enough to judge, then build towards more distant moving birds from a safe viewpoint.
How to choose a safe seawatching position
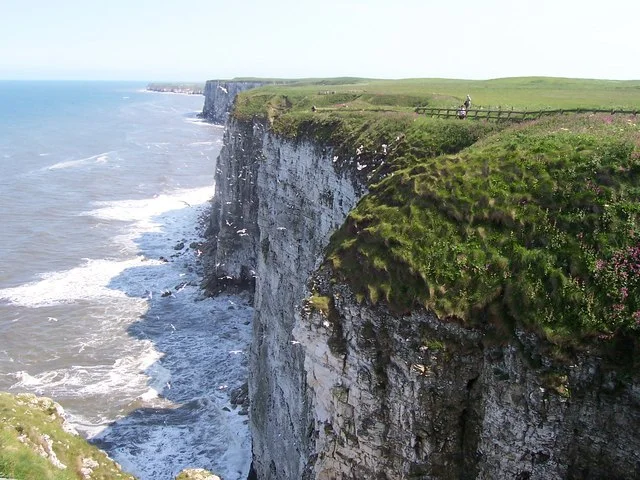
Choose a recognised public viewpoint with stable footing and a comfortable view of the sea. Read the operator’s notices and follow barriers, closures and path rules. Consider the return journey as carefully as the watch: worsening wind, rain or darkness can make an outward route much harder later. RNLI advises checking the weather and tides, telling someone your plan and taking a means of calling for help. These decisions belong before the binoculars are raised.
Our choice for a first exercise is a calm, clear session at an established mainland viewpoint. A dramatic forecast can attract experienced observers, but rough conditions make both safety and identification more demanding. Avoid copying another person’s position outside a barrier. If you cannot hold the view steady or feel secure, leave that spot. A quieter session that teaches common flight shapes is a better foundation than distant silhouettes watched while struggling to stand.
How to scan the sea in a repeatable order
Find the horizon and divide the view into a near band, a middle band and the distant sea. Choose fixed points on land where available to mark the sides of the scan. Begin close in, move slowly across the middle and finish near the horizon. Overlap each sweep slightly so that you do not leave narrow strips unchecked. Lower the optics between passes to look at the wider scene and rest your eyes.
Use binoculars to find movement and a telescope for a closer examination when you have one. Start the telescope at low power; the wider field helps you acquire a moving bird. Follow it for long enough to describe the outline and action, then return to the scanning pattern. Do not let one uncertain bird carry your attention so far that you lose the original area or step away from your safe position.
How to identify birds flying over the sea
Describe the bird before reaching for a name. Look at body length, wing shape, neck and the relationship between flapping and gliding. Note whether it travels close to the surface or well above it. Bright light, haze and distance can change the apparent colour, so keep those observations alongside the weather. Compare with a known bird at similar range if one is present. A familiar species close to shore can provide a useful scale for the session.
Watch several wingbeats rather than a single frozen impression. Is the flight steady, bounding or interrupted by long glides? Does the bird change direction around waves, or simply cross your view? Keep a broad description when detail is insufficient. An unidentified auk or distant gull is an honest outcome. If several observers are present, give direction using a shared landmark and distance band, then let each person judge what they can actually see.
Practise it here: four mainland viewpoints
At RSPB Bempton Cliffs, stay within the authorised viewing areas and compare colony birds with those moving over the sea in season. Follow one familiar bird from a comfortable viewpoint and describe how its outline changes as it turns. RSPB Fowlsheugh offers another cliff setting where you can practise the same near-to-far scan when conditions allow. Use the reserve guide to choose the public route and assess whether it suits your needs.
RSPB South Stack gives a Welsh option for learning the relationship between cliff, near water and farther sea from permitted viewpoints. At RSPB Sumburgh Head, choose a safe official watching position and practise a consistent scan rather than moving repeatedly to seek a better angle. These are separate regional choices. Their wildlife seasons and access arrangements differ, so let the individual guides shape the visit instead of treating the sites as interchangeable seawatching platforms.
How to keep useful seawatching notes
Write the start and finish time, visibility, light and wind, then record direction of travel in a consistent way. Use plain directions or agreed landmarks rather than changing between several systems. If birds circle back, avoid adding each passage automatically to a total. Separate definite counts from estimates, and note an unidentified group as such. A casual watch can produce useful personal notes without being presented as a formal monitoring count.
Stop before cold, fatigue or poor light makes the observation unreliable. Pack equipment while still in a secure place and give other visitors room to pass. Do not publicise precise sensitive breeding locations or leave the visitor route to follow a bird towards land. Review one successful identification afterwards, using the structure and flight you recorded. The next visit can then focus on a single improvement, such as finding birds more quickly in the middle distance.
For a companion exercise, choose one obvious passing bird and describe it without naming it. Compare your accounts afterwards: wing shape, flight height and direction may be clearer in one description than the other. Differences can reveal which features you need to practise, without requiring either observer to claim a difficult identification.